Transitioning to Google Analytics 4: A Step-by-Step Guide for Businesses
By Jeremy Neilson | November 23, 2023 | Google Analytics 4
Seamlessly transition to Google Analytics 4 with our comprehensive guide. Ensure your analytics are optimized and effective. Start now!

For over a decade, Google fostered its Analytics platform using Universal Analytics. In October 2020, however, they released Google Analytics 4, switching development focus entirely to this new generation.
Knowing much of their massive user base would likely be looking to switch to this new generation of the platform, Google has put in effort to make the transition very smooth, once you know the steps.
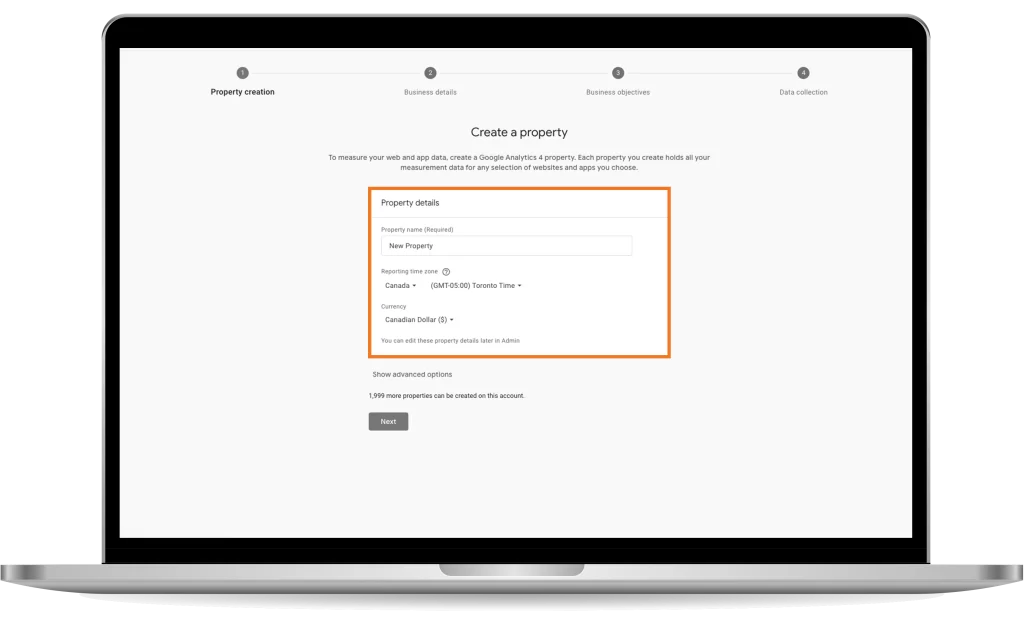
Step 1: Create your GA4 Property
To begin, navigate to your Analytics account’s Admin page, and click Create -> Property in the top left.

This will open a new tab with 5 steps. Each one is for personalizing the property, so we’ll leave the choice of how to fill each part out to you.
For this guide, we will assume you wish to track users on your website. In that case, in step 5, select Website, and enter your website URL, and what you’d like this website to be called in GA4.

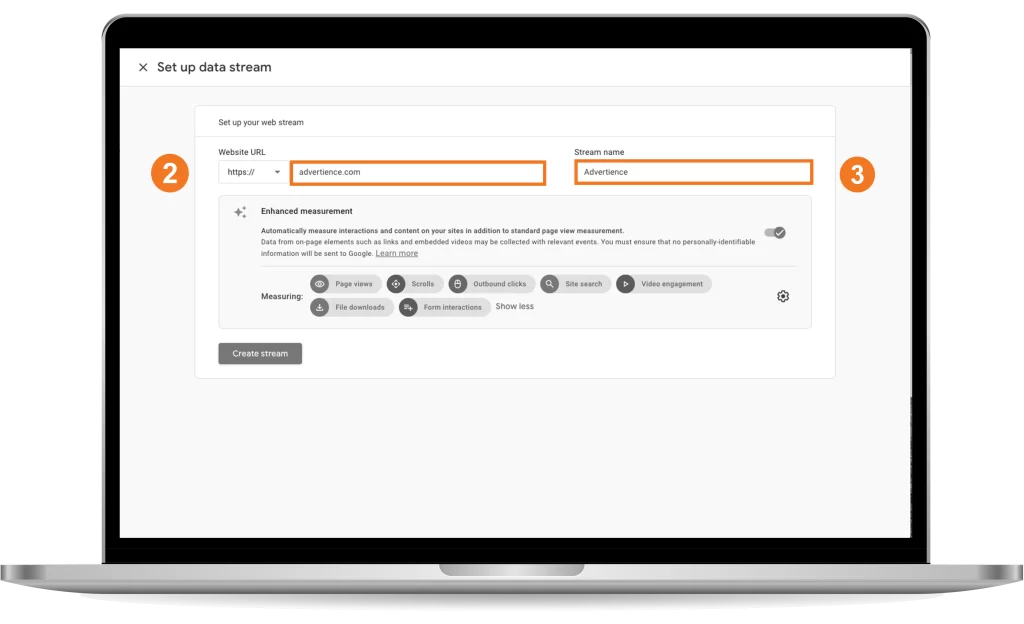
Note: Enhanced measurement is another group of settings that you can customize to your needs. If you don’t know what you’d like to track specifically yet, just leave it with the default choices.
Step 2: Install the tag on your website
Note: If GA4 was able to reuse your Universal Analytics tag, you can skip this step.
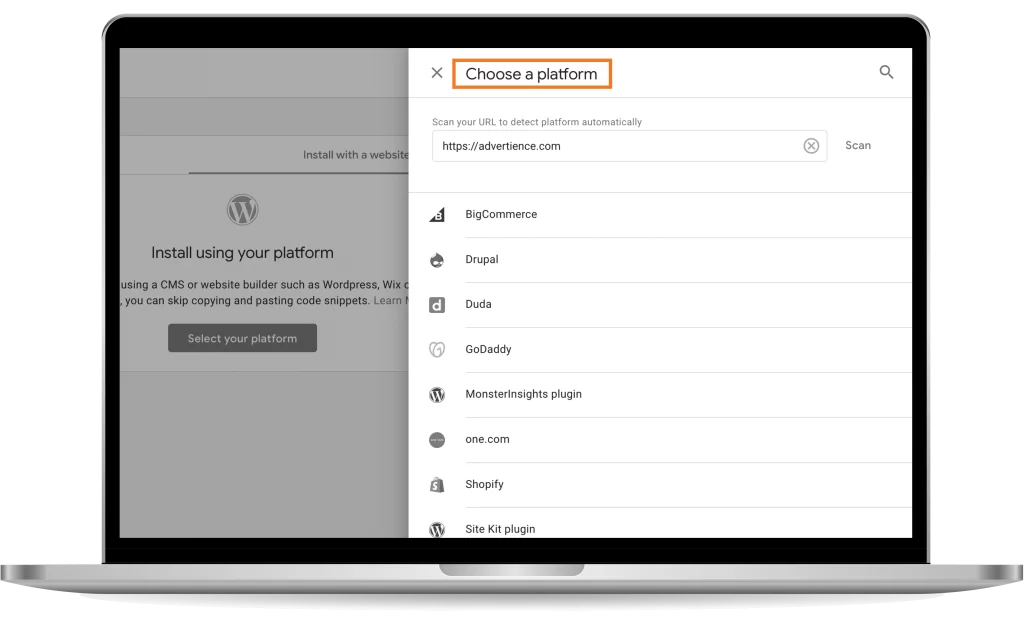
The property is created! Now you need to install it on your web page. GA4 provides two options for this, depending on the way you have your website set up. If you can edit the source code or you aren’t using a website builder, then you’ll need to copy and paste the code from the left tab of the installation page into the source code.

If you are using a website builder, like Shopify, you can select it in the right tab, and GA4 will give you tailored instructions for how to install it.
Step 3: Setup Assistant
Now that you’re property is created and installed, let’s take a look at some additional configuration, and transferring we can do.
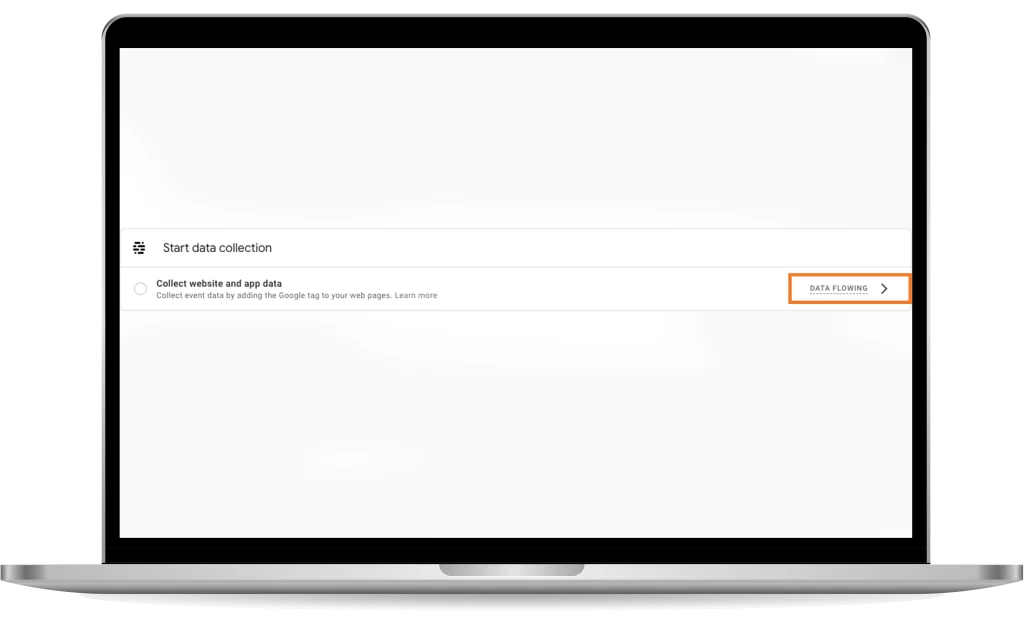
First, on the Admin page of this new property, select Setup Assistant. If you’ve installed the tag on your website, you should see under Start Data Collection -> Collect website and app data, that the right side says Data Flowing. If not, it might be because of a delay in GA4’s processing, or you incorrectly installed the tag, and need to check the steps you took.
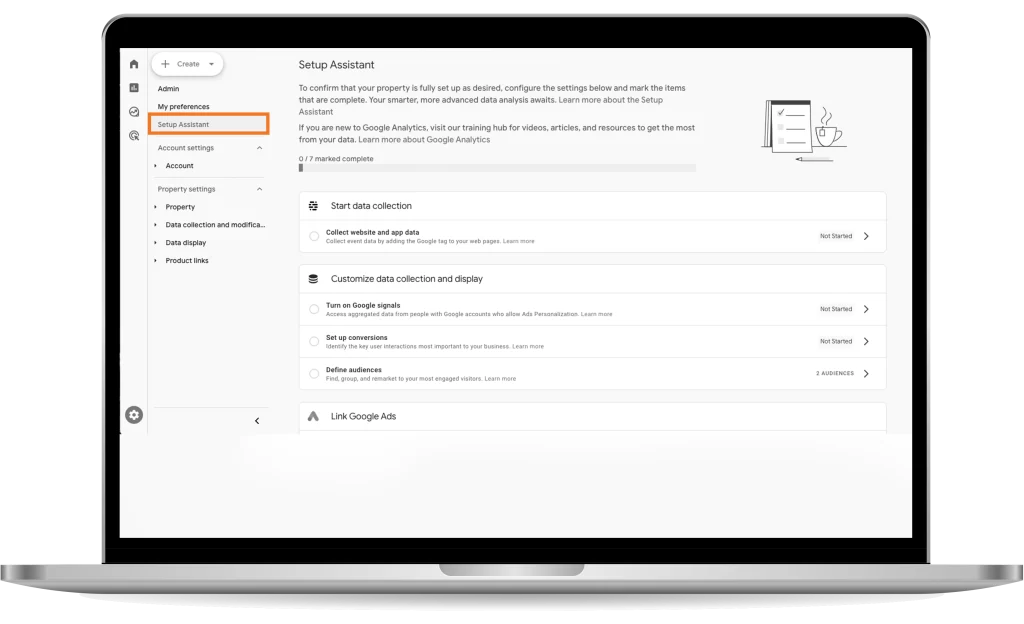
Next, let’s work on the sections under Customize data collection and display.
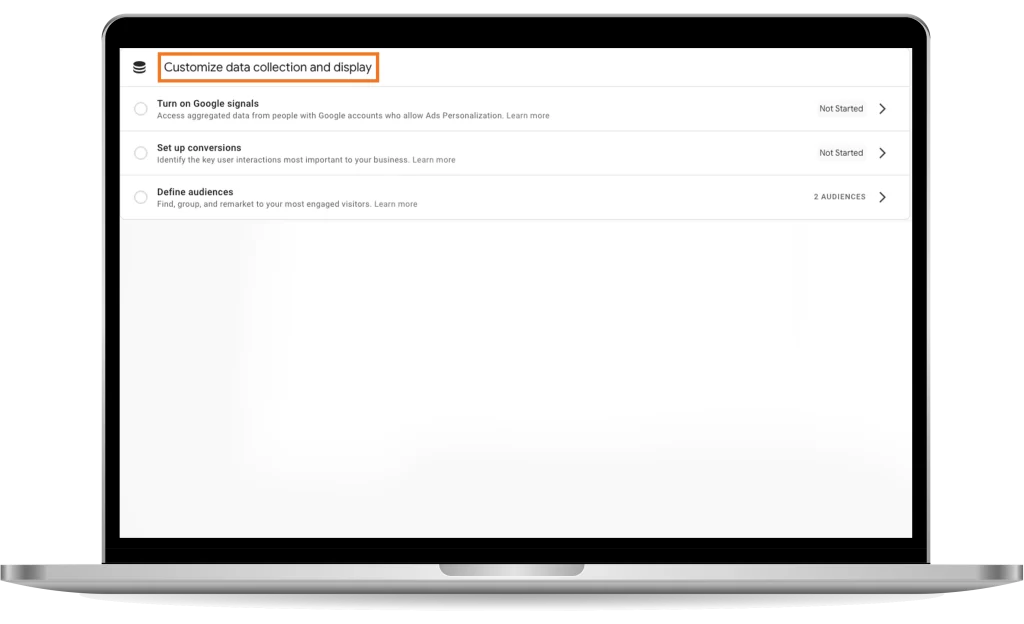
Turn on Google signals:
You may want this feature turned on, especially if you already do in your UA property. Essentially, Google Signals is Google associating user data from the visitors of your webpage with other data they’ve collected about them, to enhance data analysis and ad personalization.
Setting up conversions:
In case you didn’t know, conversions are Universal Analytics’ Goals. If you transferred from UA, you may have eligible Goals that can be converted to conversions. If so, you should be able to click the “>” icon on the right and select Import from Universal Analytics. This tool will help you select which Goals you want to transfer over.
If you don’t see this option, you’ll have to do it from scratch. Instead, click ‘Manage conversions’ and it will bring you to a page showing all the conversion events, of which there should be none.

To start, click New Conversion Event and enter the name of whatever conversion you want to bring over. Do this for all the conversions your website will be sending over, and your GA4 is good to go with tracking them!


Define audiences:
This step has no way to migrate audiences from UA, you’ll have to redefine all your audiences yourself. Similar to conversions, click ‘>’ -> Manage audiences, and this page allows you to see all your current audiences, and define all new ones that match your audiences in UA as closely as possible.

Note: You can skip this if your properties aren’t linked to Google Ads.
Step 4: Migrating Users and Permissions
Now that most of the functionality is working for your property, you’re probably going to want to give access to all the same people who used your old property.
To do so, we recommend following Google’s own documentation about this, as they’ve developed a Google Sheets extension and provide a guide for installing and using said extension to bring your users over. Here’s the link.
If you don’t want to do that, you’ll have to add them all manually. To do so, navigate to Admin -> Account settings -> Account access management. In this pop-up, you can edit all permissions for your account, adding and removing users and changing permissions as you see fit.

And there you have it!
Your Google Analytics 4 property is essentially ready to go! Linking your Google Ads account is another step you may wish to take, and the Setup Assistant can help you with that, but as far as migrating your Universal Analytics property goes, you’re set!
Wondering if you have your GA4 property set up for success? Have it audited to ensure the data you’re collecting is meaningful and trustworthy.
For additional information and guides to help you on your journey with Google Analytics 4, whether it’s your first time with the platform or you’re a Google Analytics veteran, check out our other blog posts on GA4.